
An interactive, dynamic website with animations is increasingly relevant. But how can we create animations? What tools are used? How do they affect performance?…
Keep reading — you're going to be surprised.
Step 1: Animation planning
The essential thing in every project is to organise it — otherwise you'll waste resources of all kinds. Yes, time, money and patience…
For that, I recommend having clear objectives for your project, asking yourself who you want to address and where you want to take them.
Once you have that clear, you'll be able to create AI animations for your website focused on your target audience.
For example, in this article I'm addressing people who want to create animations for their website. And, if they don't have the time or the knowledge to do it, they should click the contact button to acquire that service.
So what kind of animation can I create?
Something I came up with is a man worried about his website who hands the work over to a professional, looks at the clock and runs off.
Let me show you the step-by-step process.
Step 2: Script
Now it's time to write a structured script so we know what clips to include. You don't have to be a genius for this — just imagine what steps you want shown.
For the initial example I proposed, I'll follow these steps:
- Main character tinkering with the website and it breaks, calls a professional. Main character looks at the clock and runs off.
- Professional works on the website and calls the main character, who is at the beach, smiles and gives a thumbs up to show he's satisfied.
- Main character alone on screen speaks saying: "For professional work, call WebHeroe". The professional also appears and says "Don't forget"
Step 3: Image generation with AI
Once I'm clear on what I want to do, I need to create reference images for each clip.
For that we can use a ton of tools, some free. Although it's true that, to date, the one that works best is Midjourney.
These are the steps I'll follow:
- Character creation in Midjourney
- Character improvement and modification in Replicate
- Scene creation in Midjourney
- Improvement with an upscaling tool like Topaz
- Retouching with Photoshop to adjust initial images
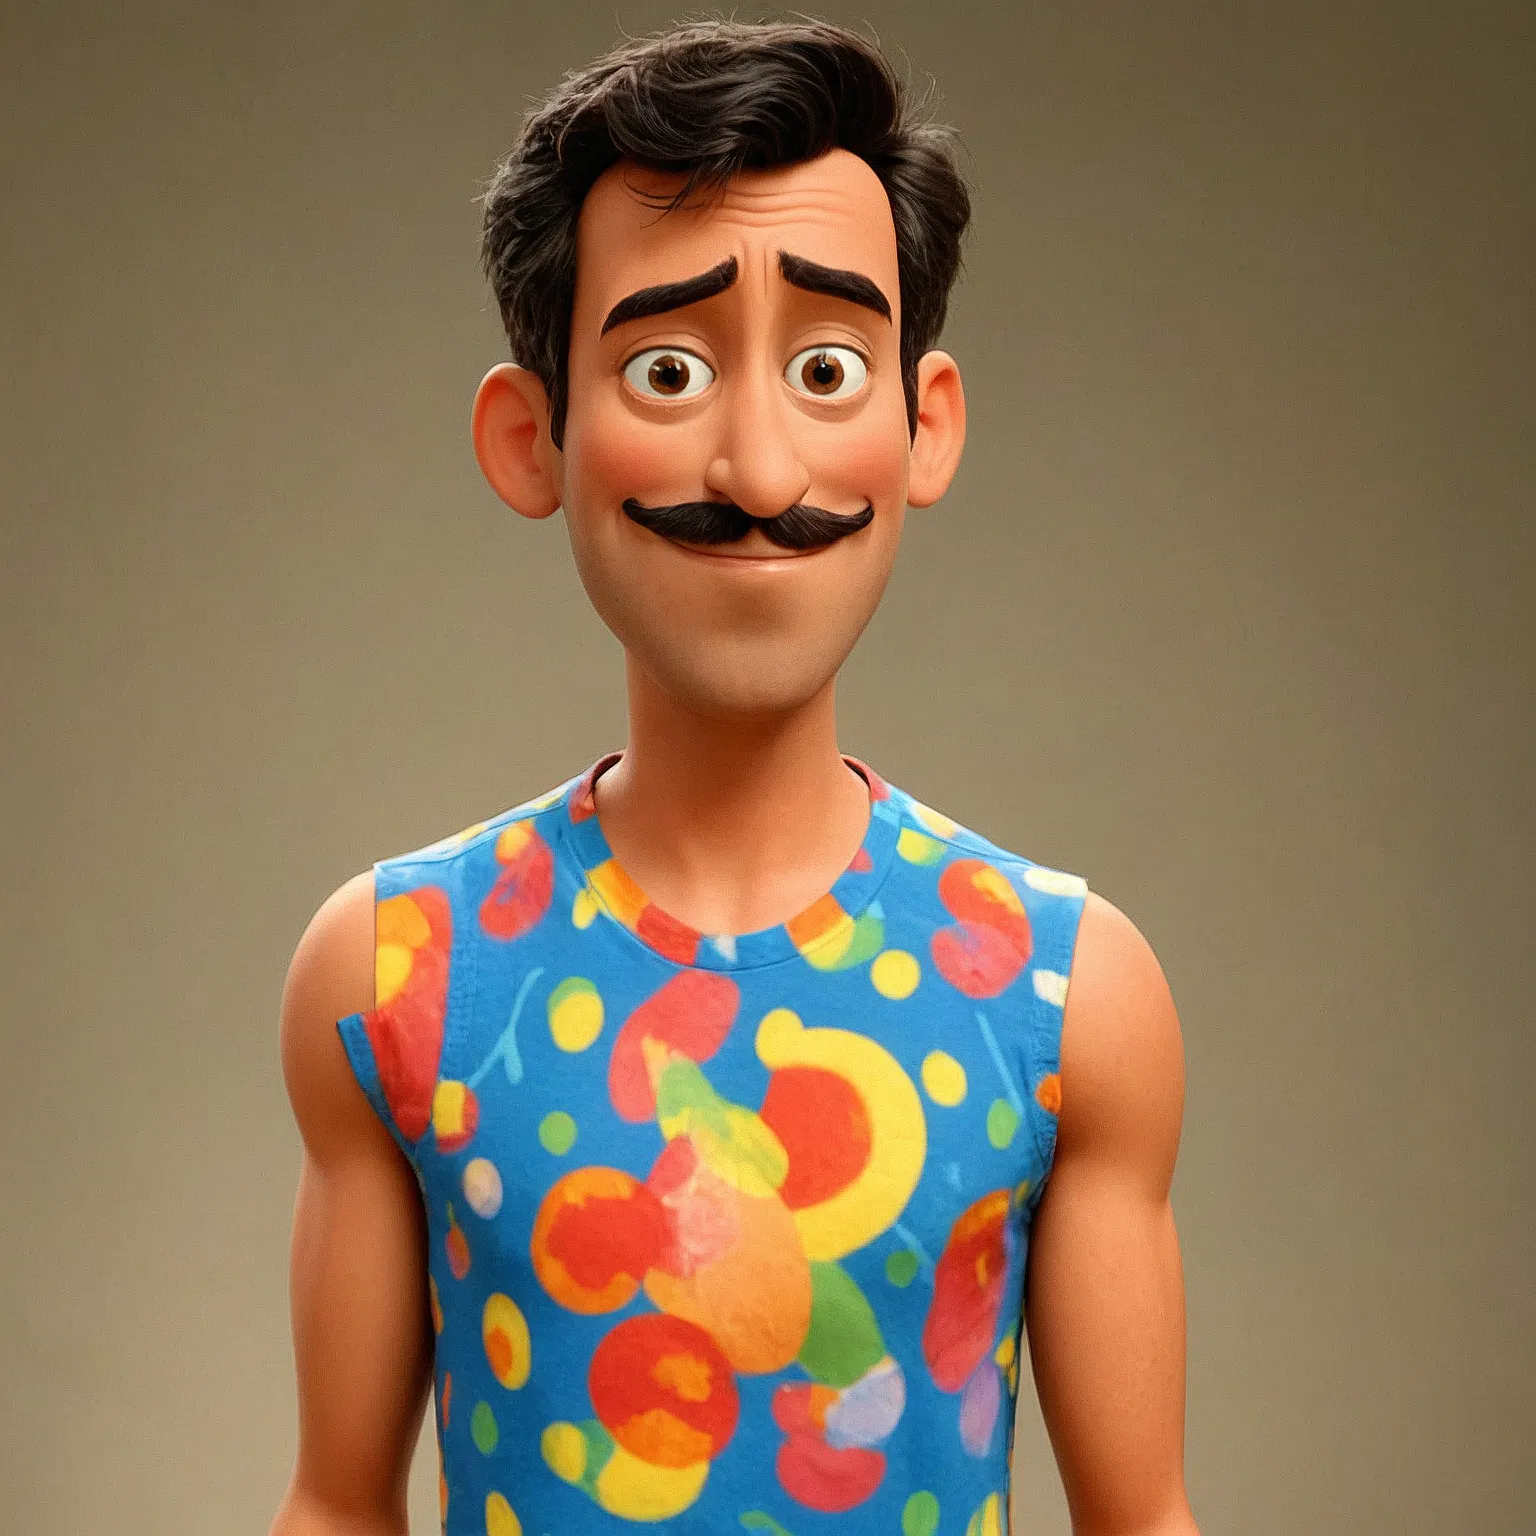
This is the initial image of the main character generated with Midjourney.

In Replicate, there are many tools that allow us to improve and generate images of the same character in different positions. These are the images I liked after several attempts.

Once I've selected the images I like most for the characters, it's time to create the reference images for the video clips. And for that, what better tool than Photoshop — with its generative fill feature we can play around and fill in the missing parts as well as fix possible errors in the initial images.
Here, for example, is the opening image generated with Photoshop and then upscaled.

Not bad, right?
Step 4: Available tools to create an animation
If we search for "AI video tool" in any search engine, we'll get endless lists.
It's true that we'll find many platforms offering free services. But I'm sorry to say that you'll need to generate many clips before finding one that fits. That's why there's still no free tool that really allows enough content generation to create a project efficiently.
At WebHeroe we have access to a large number of professional tools, but for this project we chose to use Kling.
We also have access to other tools that give us greater control over the clips, but the resource consumption is much higher, not to mention the processing power required on the workstations.
So since this project is something fairly straightforward, Kling will be more than enough.
The only downside to using this type of online platform is that without having absolute control, you have to be flexible regarding the outline you have in mind.
Step 5: Clip editing
Once we have all the clips downloaded, it's time to roll up our sleeves and use a video editing programme to put them together.
I usually use Premiere Pro, but you can use any other.
There will be many occasions when you need to change a clip. But if you created the script correctly and in an organised way, you won't have a problem.
Step 6: Sound effects, music and video upscaling
I personally like to do the video upscaling before editing the video, especially because if we find any error when we're checking that the upscaling was done correctly, we can fix it without having worked on the audio yet, which will save us work.
To finish off and bring the project to life, nothing beats a good set of sound effects and some background music.
There are AI platforms like Suno that allow you to generate sound effects and music with the ability to use them in commercial projects.
Once we have everything, we'll use the video editing programme again to place the audio in the corresponding places.
And hey, that's everything — I hope you enjoyed the guide. Take a look at the example project I created for this article.
Comments
Be the first to comment on this post.